
I LOVE DIY projects! I have literally, THOUSANDS, of pins on my Pinterest page. Meals, party planning, renovation ideas, etc. Of course, like many people, I’m pinning many of these projects to do when hell freezes over on a rainy day. But, I had to share with y’all, my latest project, that I am quite pleased with myself about!
The ceiling fan in the master bedroom was a joke. It came with the house. The light fixture had 3 lights that had a globe cover to it and did not put out much light. Our room always felt dark. The fan itself was horrible. It was set on high speed, but the motor was starting to crap out, making high speed look and feel like low speed. Seriously. Molassis dripped faster than this fan went! The Dude and I knew we had to replace it. Several weeks ago, we went to one of the big box home improvement stores to window shop for a new fan. We found one we liked, to the tune of $110.00. It was pretty, shiny and new. But, for now, outside our budget. We figured, now that we found one we liked, we could start saving for it and maybe get it in a month or so.
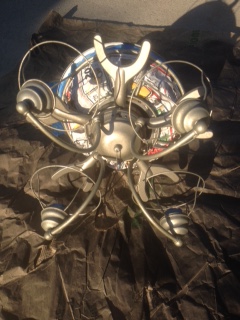
I belong to several local classified FB pages. I am a big believer of one person’s junk is another person’s treasure. And you can find some great deals! A few days after our shopping trip, someone posted an ad of a ceiling fan they were getting rid of. Nothing wrong with it, they upgrading to a different style. This is the picture that was posted with the ad:

The ad read: 52 inch pewter ceilling fan. Works great just upgraded to something bigger.
Beautiful, right? Best part? THEY WERE ONLY ASKING $40.00!!!! $40.00 PEOPLE! I was the first to respond, sent a PM and picked it up a few hours later. The only problem with it was the pewter color. Our room decor is cherry furniture, wrought iron, style. While the style would look great, the pewter color would not work. Well, there’s nothing that a good ole’ can of spray paint won’t fix!
I love spray paint. Seriously. Love it. It’s an inexpensive, easy fix to many things. I knew I could spray paint it with my fav color, Oil Rubbed Bronze. Rustoleum has a great line of spray paints, with tons of colors to choose from. I especially love their Universal Metallic Oil Rubbed Bronze. I’ve used this on many projects over the years. Works great and has a nice finish to it. Even better, it has primer and paint in one.

Rustoleum Universal Metallic Oil Rubbed Bronze
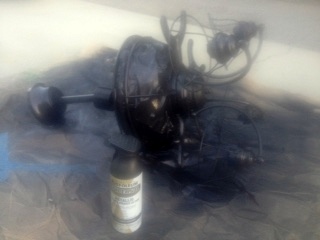
I set to work on my project. I already had a spare can of spray paint at home, so that saved about $6.00! First, I removed all the globe lights off, (well, for the sake of honesty, The Dude did this for me. I could have, but he was being a sweetie and helped me out). There is a large, surround light globe on it, but that would have required taking apart the entire fan, so to save time, I covered that part with newspaper and painters tape. 
Next, I covered the electrical sockets and wires with painters tape. Make sure to do this! You don’t want any paint messing up the electrical parts. Also, make sure to remove any stickers that are on the fixture. Then I started spraying! Making sure to to light, even sprays, to avoid any drips. You don’t want to spray heavily. This can make it look uneven. Keep a light finger on the trigger. Let it dry. You may have to do a couple of coats, but when I looked carefully, I only found a couple areas that I had missed, so a full second coat was not needed.
Looking good!
We ended up waiting about a week before putting installing it. I wanted to make sure that it was fully dry. And it was also just finding the time for The Dude to hang it. Oh, but it was worth the wait! Check it out!
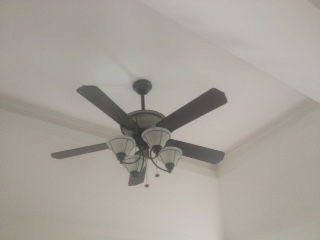
LOVE IT!
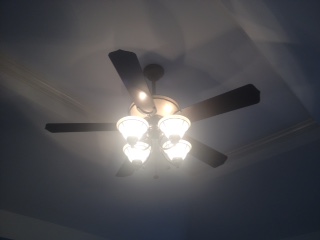
PERFECTION!

I love DIY! I wish I knew how to post pics of an entertainment center base that I made into a buffet!!! The whole cost about $60!
LikeLike